Courtesy of curious refuge
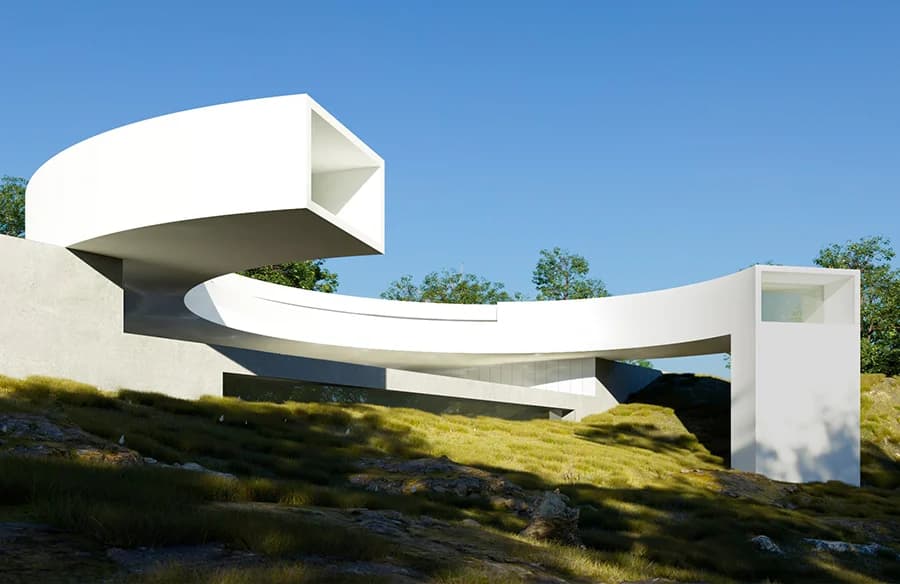
Imagine doing a rough sketch of a building with just a few lines on paper, capturing an early idea. Now imagine watching that sketch transform into a glowing render of glass and steel, or into a watercolor-style concept sheet ready for a presentation. This is the magic of ComfyUI.
What is ComfyUI?
ComfyUI is built on Stable Diffusion, but unlike platforms where you simply type text prompts, it uses a node-based workflow. For architects and designers, this approach feels familiar, much like connecting components in Grasshopper for Rhino. Each node has a clear function, and by linking them together, you create a chain that generates images in a step-by-step process.
At first, the network of nodes can look complex, almost like a puzzle. However, once you begin, the logic quickly becomes clear. To get started, here are five essential workflows in ComfyUI that are simple, powerful, and fun to try.
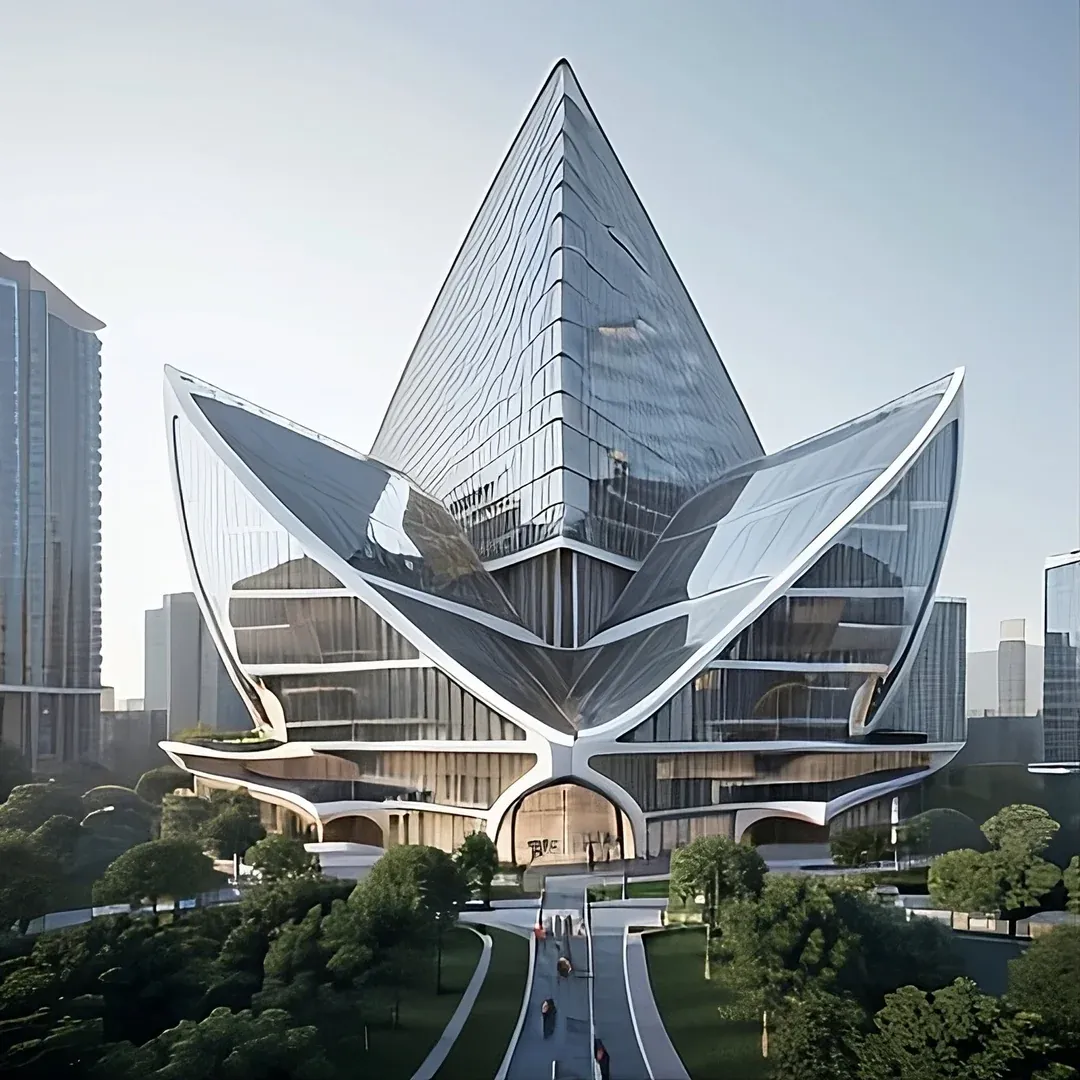
1. Text-to-Image: The Starting Point
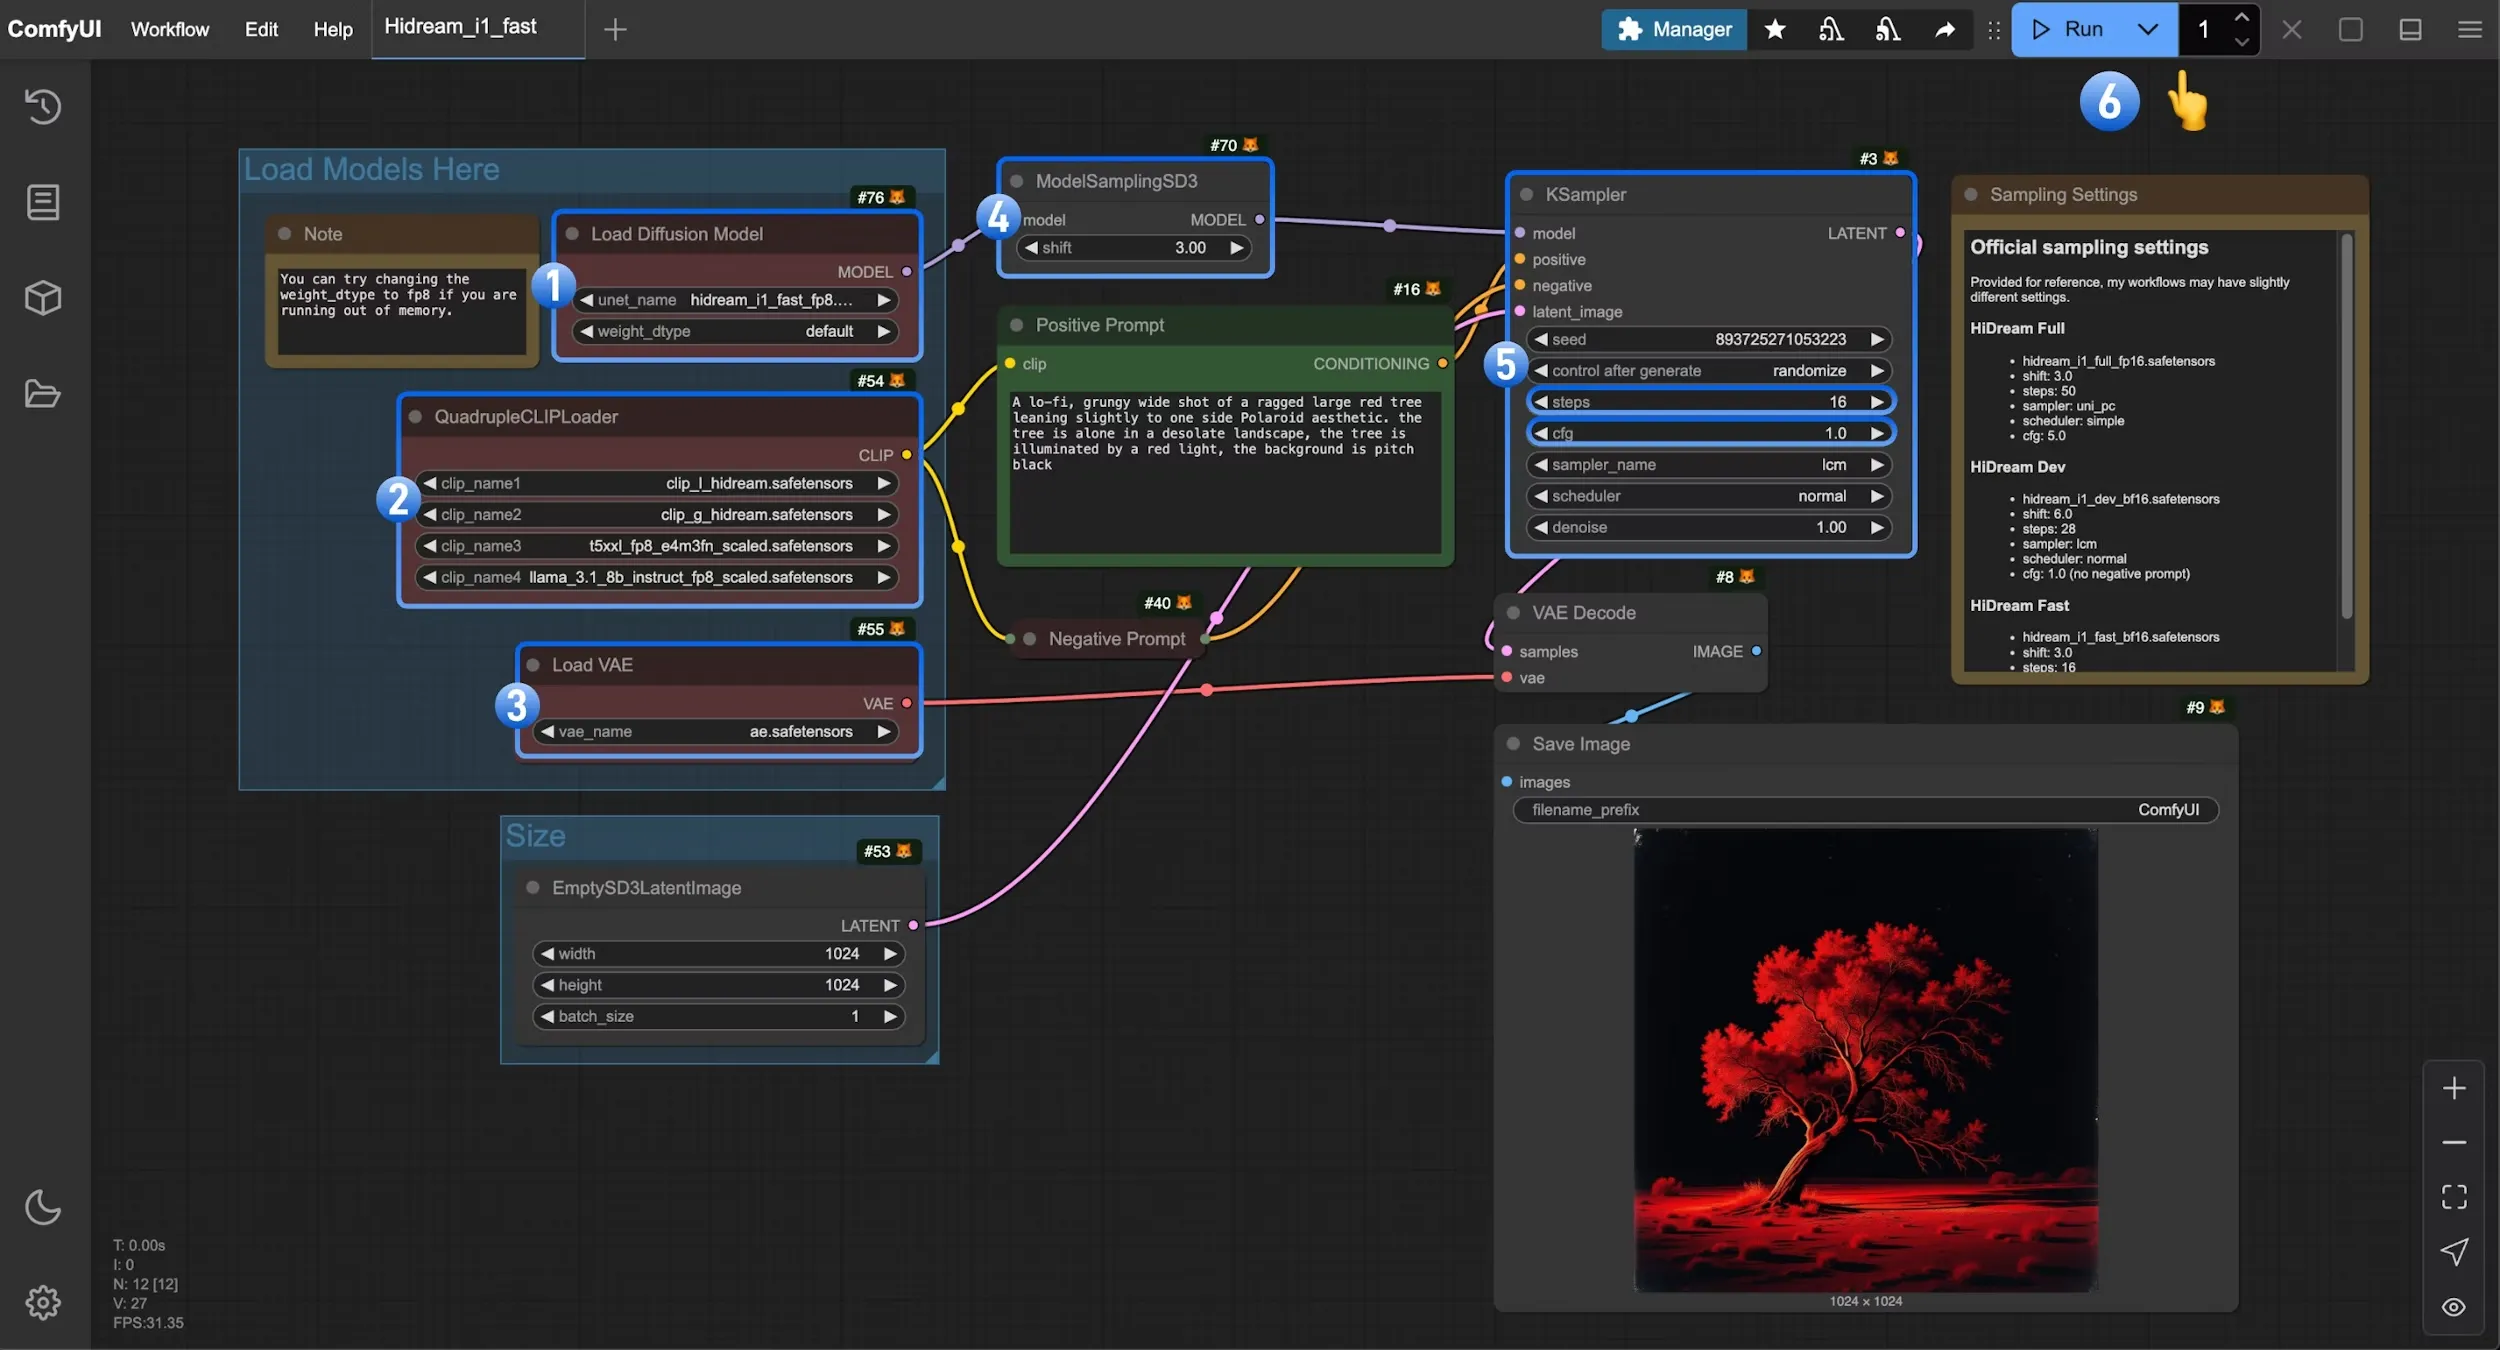
The most basic workflow in ComfyUI is text-to-image. In this setup, you type a description of what you want, and the software generates an image from that text. For example, you could write “a futuristic museum with flowing curves inspired by Zaha Hadid,” and ComfyUI will create different variations of that prompt.
This workflow is important because it introduces the fundamentals of how nodes are connected. Typically, a text prompt is processed by the model, then sampled, decoded, and finally saved as an image. Once you try this, you will see how easy it is to adjust the steps. You can change the checkpoint (the model file you use), adjust the sampler settings, or refine the prompt to get very different results.
For designers, text-to-image is the best place to start because it builds confidence in working with nodes. It also shows the potential of AI as a design partner, capable of creating fresh concepts within seconds.
2. Image-to-Image: Building on Existing Ideas
After you are comfortable with text-to-image, the next step is image-to-image. Instead of starting from a blank prompt, you upload an existing sketch, render, or photograph and guide the AI to reinterpret it. Start by uploading a quick hand sketch of a pavilion and prompting the system to show it as a glass-and-steel structure, or as a timber canopy inspired by parametric geometry.
This workflow is powerful because it plays with AI interpretation. You bring the base idea, and the software helps you expand it in multiple directions. Architects and designers often use image-to-image to evolve a concept quickly, producing variations that can spark further exploration.
It is also helpful for improving old renders. An outdated design image can be refreshed with new materials, lighting, or even architectural details, making it look modern and presentation-ready.
3. Inpainting: Changing Specific Parts of an Image
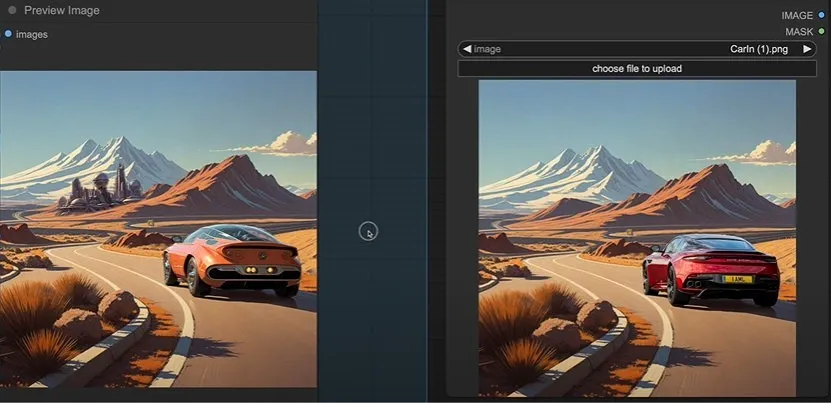
Sometimes you may like most of what the AI produces but want to change just one part. Inpainting allows you to do exactly that. You simply cover the area you want to modify with a mask, then prompt ComfyUI to regenerate only that section.
For example, you have a building render with a plain blue sky. By masking the sky and prompting “dramatic sunset with orange and pink clouds,” you can instantly replace the background without affecting the rest of the image. Similarly, you could change furniture in an interior render, swap out materials, or add greenery around a building.
This workflow feels similar to Photoshop’s generative fill tool, but in ComfyUI, you have more control because everything is part of a visual workflow. For students, inpainting is a great way to polish design boards. For professionals, it is a practical method to make competition entries or client presentations look more refined.
4. Upscaling: Turning Small Images into High-Resolution Renders
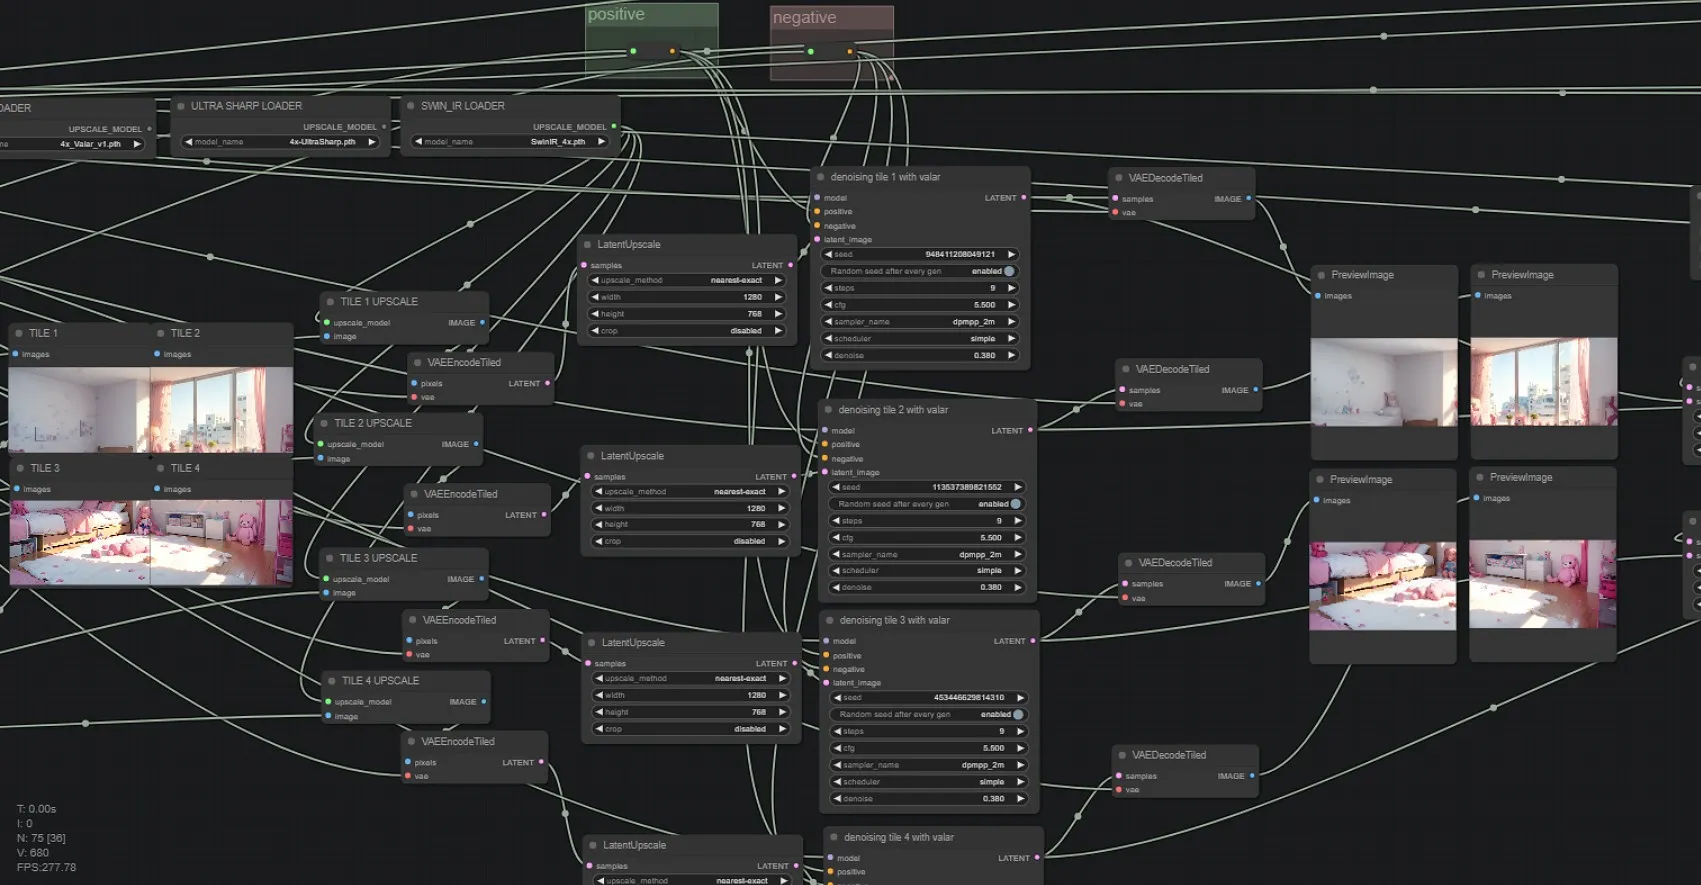
One limitation of AI-generated images is that they often start at a small resolution. They may look fine on your screen, but become blurry when printed or shown on a large display. The upscaling workflow in ComfyUI solves this by enlarging images while keeping the details sharp.
For example, a render created at 512 pixels can be upscaled to 2048 pixels or higher, making it suitable for posters, exhibitions, or client boards. This is especially important for architects and designers who need their visuals to communicate clearly at different scales.
The process is straightforward: you load the image, connect it to an upscaler node, and save the higher-resolution version. The result is often more detailed and polished, which means your AI experiments can move directly into professional presentations without losing quality.
5. Style Transfer: Mixing Content and Aesthetics
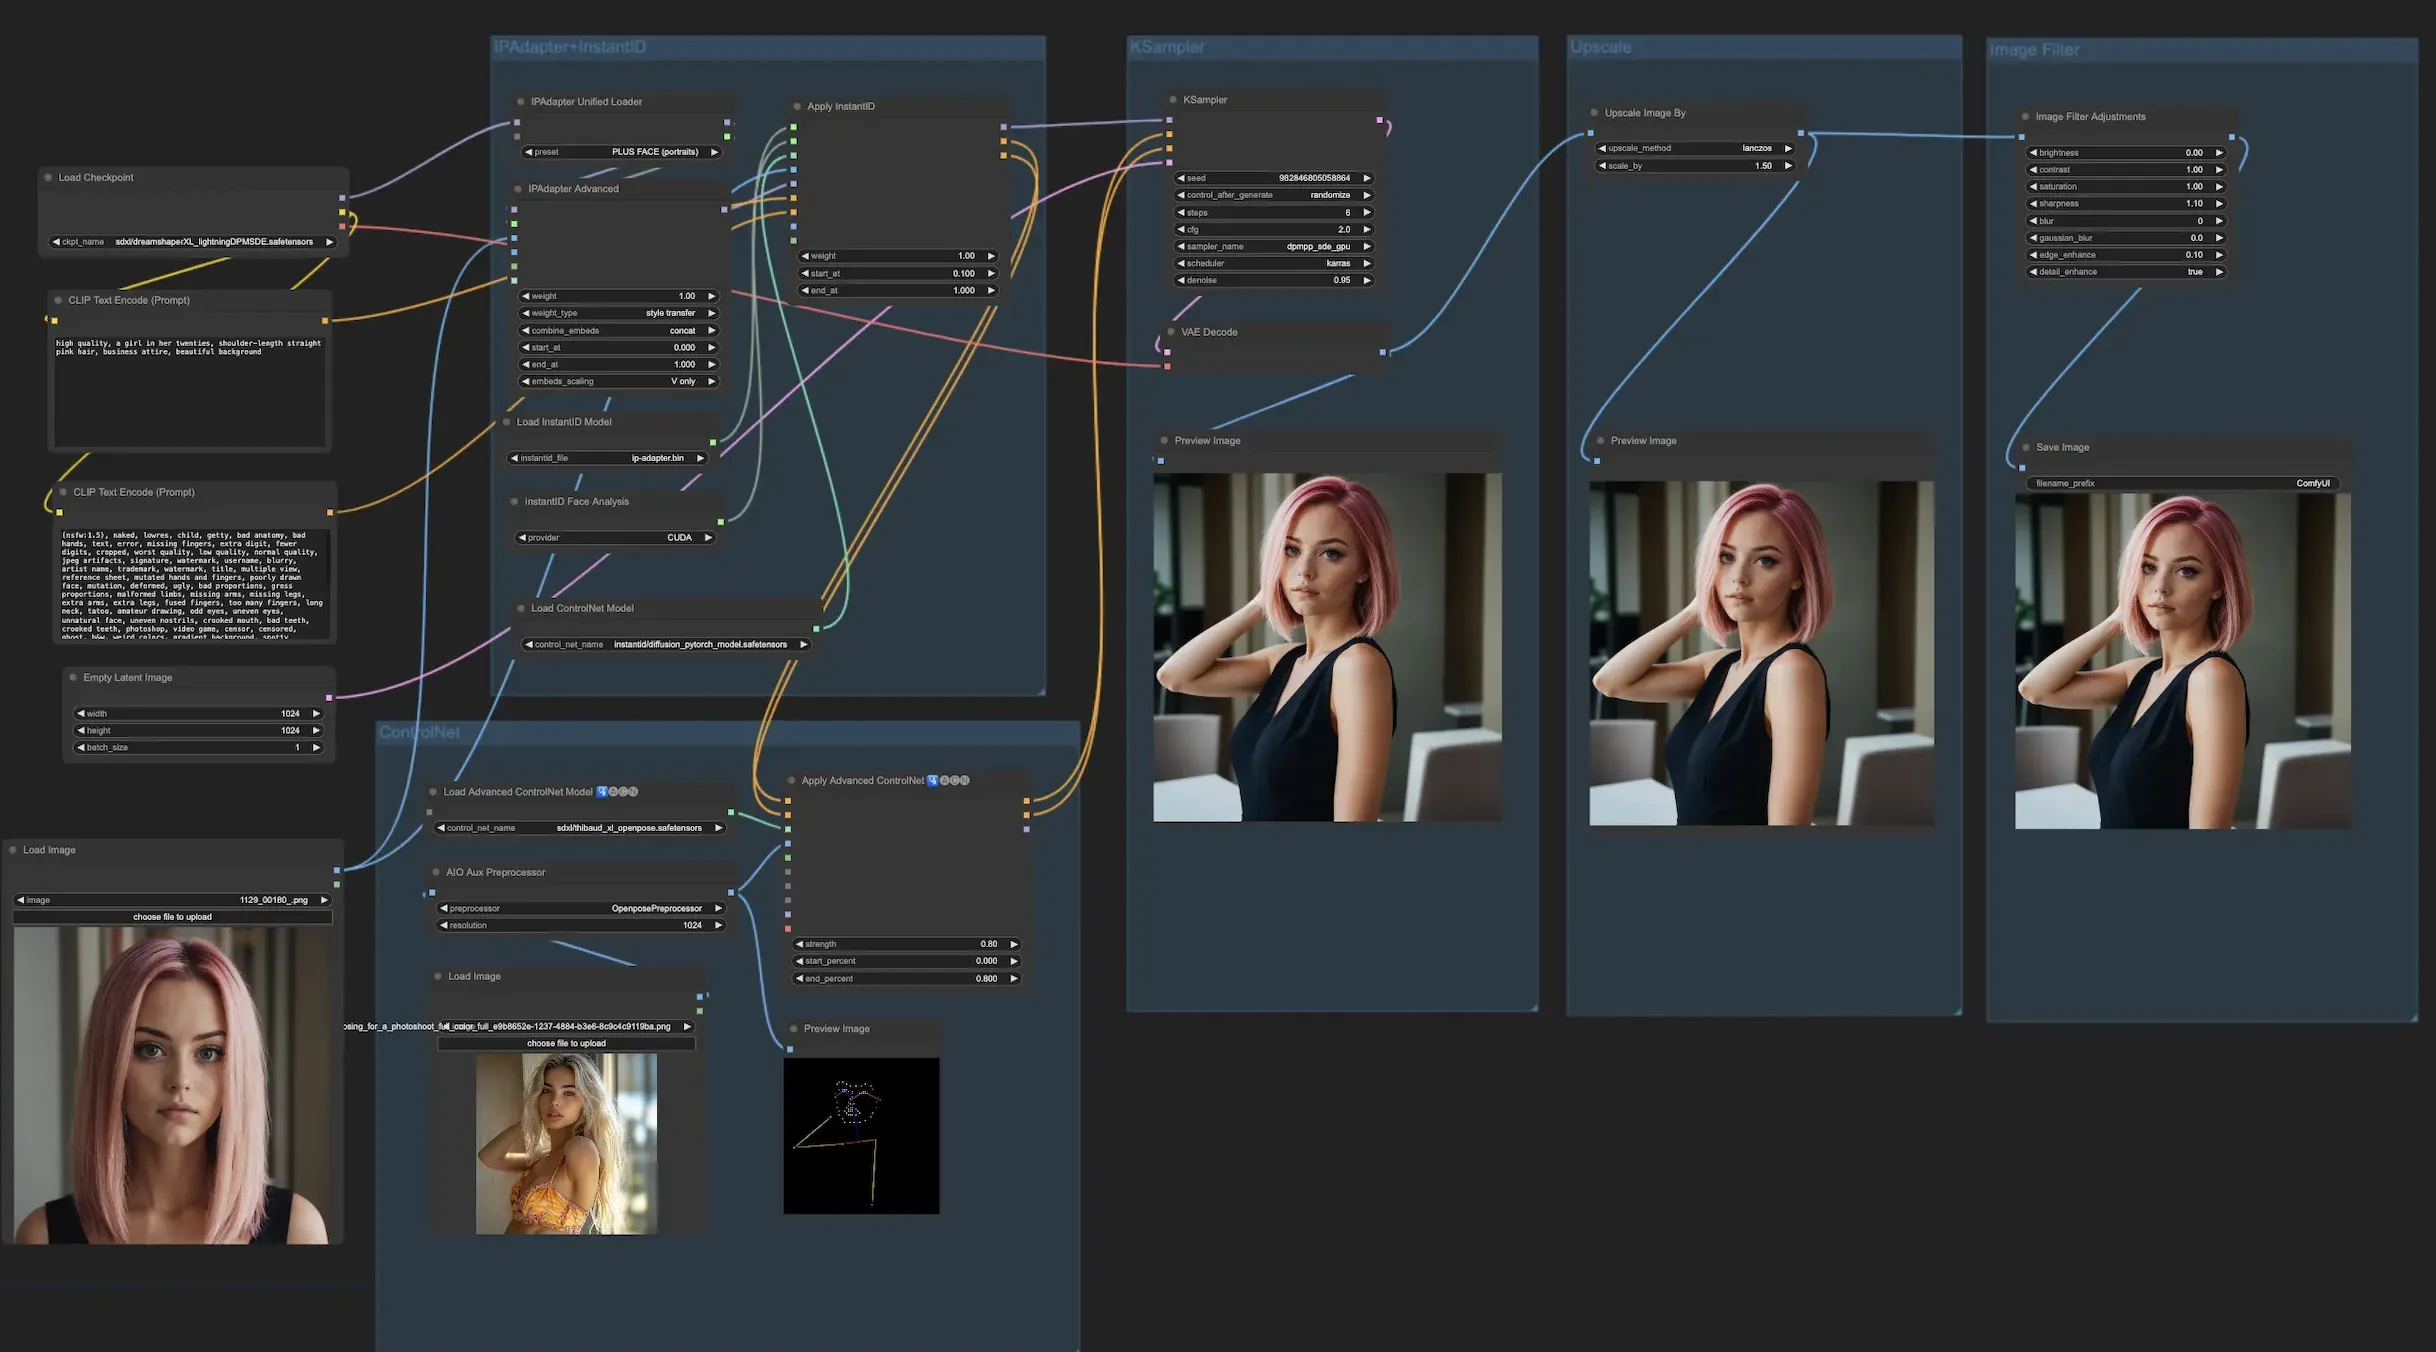
The fifth fascinating workflow is style transfer, which is both fun and highly creative. It lets you take the structure of one image and combine it with the style of another. For instance, you can upload a photo of a modern city skyline and then apply the style of a watercolor sketch. The result is a hybrid that looks hand-drawn yet remains accurate to the original geometry.
This workflow is valuable in architecture and design because it allows you to experiment with representation styles quickly. A single project can be shown as a photorealistic render, a conceptual diagram, or an artistic sketch—all generated through style transfer. Instead of spending hours in Photoshop or Illustrator, you can explore different looks in minutes.
Style transfer is also useful for presentations where you want to convey mood and atmosphere rather than technical detail. It allows you to communicate ideas in multiple ways depending on the audience, whether it is a client, a jury, or a classroom.
For architects and designers, the node-based structure of ComfyUI feels very similar to parametric design tools. Once you understand these basics, you can move on to more advanced features such as ControlNet, LoRAs, or even building custom workflows tailored to your practice.
If you're ready to take these ideas further, PAACADEMY’s The Diffusion Architect 2.0 workshop is a great next step. Led by architect Ismail Seleit, it equips you with advanced AI models like SDXL and Flux within ComfyUI and other relevant tools.
.jpg&w=3840&q=75)